Pokazywanie postów oznaczonych etykietą Tutorial. Pokaż wszystkie posty

poniedziałek, 11 listopada 2013

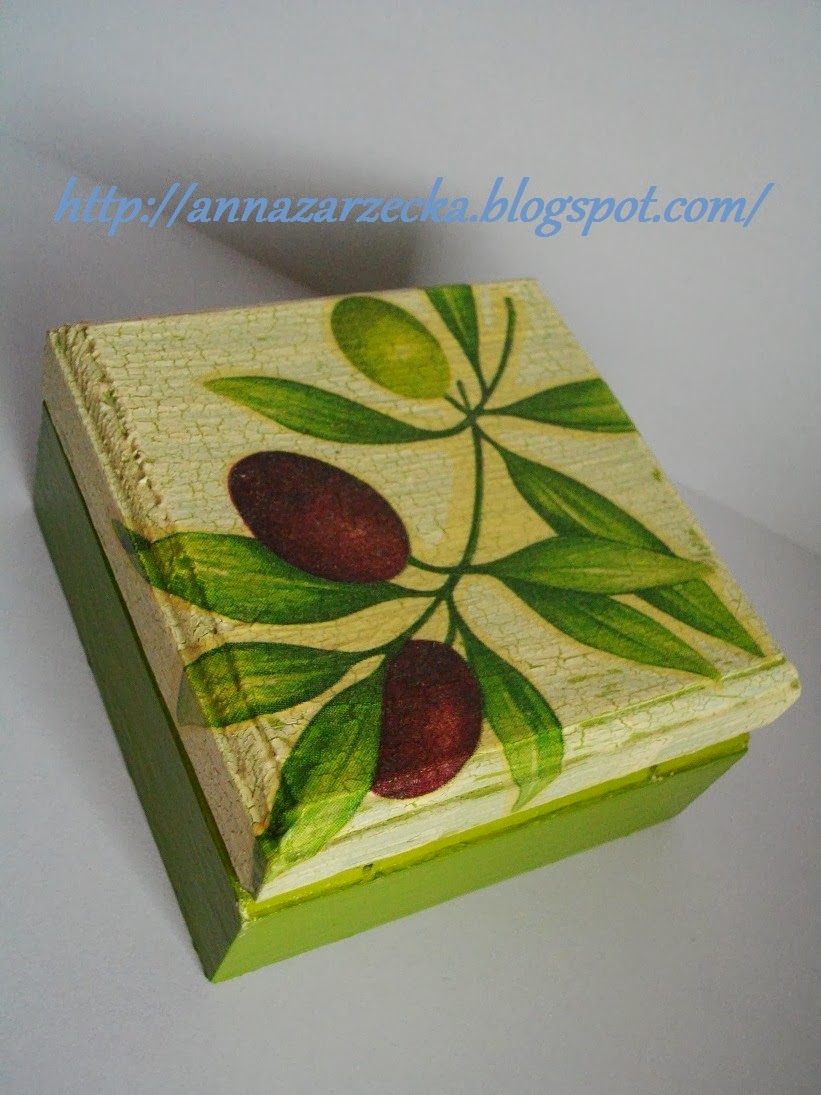
Decoupage tutorial

Hello!

I invite you all to learn the decoupage decorating technique. 
NOTE: If you are using my tutorials please add my blog to your site J
If you want to share your work email me: anna.zarzecka88@gmail.com

You'll need:
  • brush
  • paint to crack
  • adhesive varnish
  • lacquer
  • handkerchief with our favorite theme  (I chose a floral design)
  • acrylic paint (two colors, light and dark)
  • sandpaper
  • box, or other unpainted wooden object.

Making is not difficult but it's time consuming, because you must wait between putting the layers, until the previous layer is dry. Anyone can do this! I will decorate the jewelery box as an example to show you what to do step by step.

STEP 1: Before you start painting the surface should be polished with sandpaper, so the casket wont look messy after painting.


STEP 2: Paint the surface with the darker paint. If your box have metal parts, please remember to keep it clean before the paint dries. I've used gold paint and usually use metallic inks, because I like the cracks to have a metallic sheen.


STEP 3:  After the paint has dried, we put a thick layer of cracking paint . Unfortunately, now we have to wait until the paint is dry, it might take some time.


STEP 4: Once the crack paint is dry, use brush or sponge to cover the entire surface of the lighter paint (do not paint two times the same place, or the paint will not crack).


STEP 5: During the time of paint drying, select a theme from tissues, which you want to decorate the surface with, and cut it with scissors, or tear off, which also gives a very nice effect.


STEP 6: Separate the theme from the other layers of the tissue and stick it with varnish, working from the center to the edges of napkin. Do it carefully and slowly to make handkerchief  well smoothed, which will give even nicer effect.


STEP 7:   When the glued handkerchief is completely dry cut the opening with a knife.


STEP 8: The next day when we will be sure that everything is perfectly dried, paint the surface. Several thin layers of paint and the box will look beautiful. READY! J

So get to work!


 And that's my two favorite bookmarks done a long time ago :) 


czwartek, 7 listopada 2013

How to make a salt dough angel tutorial!

Hey! Welcome to the tutorial how to make a singing angel, which can be a beautiful gift for loved one, as it can be perfect to hang on the Christmas tree, and in larger sizes on doors. EVERYONE, even those who have just started their adventure with the salt dough will be able to make such an angel after this short tutorial ;)

If You like to, join my Facebook and to send your decorations and products on my email - anna.zarzecka88@gmail.com so I can create a gallery of your beautiful works.

Note - If you use my courses put a link to my blog :)

You probably already know how to make the salt dough, and if not, then I invite you to my previous post, where I gave the exact proportions, the types of ingredients and additives  <Click Here> .

To create an angel you will need:
-a knife,
-a roller,
-a brush with water
- a paper clip
-a piece of aluminum foil,
-special scissors for the pattern

STEP 1 prepare ordinary salt dough, as well as one with the addition of cinnamon (we'll need it for hair) to stain the dough brown, and to add a beautiful aroma to our angel.
STEP 2 you need to roll out a piece of dough, preferably to thickness of 0.5 to 1 cm. With a knife cut the sides of the dress. They may be halfround or bell-shaped (twisted outside)
STEP 3 bottom of the dress should be cut off with special scissors that'll make it look flounce alike.
STEP 4 the finished dress place on a piece of aluminum foil.
STEP 5 the same way we make another, shorter piece and put it on the previous one.


STEP 6 wings: cut out a circle and cut it in half, attach the wings to the dress, after wetting a place of connection, and put a paper clip from the top, which will make the hook.
STEP 7 form the head, wet the wings on the connection and attach it, and then make a smile with a toothpick.


STEP 8 To decorate the angels dress wet the place to decorate, and then sprinkle with groats (as pictured).
STEP 9 hair will be made of cinnamon dough, after rolling out, cut a strip. Pre-wetting the head at the place you'll attach the hair and put them in a manner that you like. I wrapped the tips in helixes :) (to the angels hair, you can also use garlic squeezer, with which you can too create a beautiful hairstyle).
Step 10 add the hands, which have th form of two small balls pressed to each other.


READY ANGEL BEFORE BAKING!


STEP 11 bake the angel in oven at the lowest temperature for a few hours (mine is 125 degrees Celsius), until it is completely hard and ready for the next step - painting.
STEP 12  PAINTING!
I myself used paints:
  • gold (available at art stores) on the wings, and to finishings,
  • white on an angels dress,
  • black for eyes + my blush, which work with the angels (gently with a stick for eye-painting).


STEP 13 at the end glue a ribbon with a strong glue
(I use FIX-liquid nail). 

FINISHED ANGEL:


Finished singing angel that can be a great gift for a loved one. 
Waiting for yours, get to work! :)

wtorek, 29 października 2013

SALT DOUGH RECIPE

RECIPE FOR SALT DOUGH

You can find many recipes for salt dough on the internet, and all of them says to add one cup of flour, a cup of salt, water + additives such as wallpaper adhesive or potato flour, which I was using at the beginning, but the details crumbled in my hands, and when I was able to create them, they cracked in the oven, or a bubble arouse on the figures bottom, which meant that my work went to waste. After many trials and errors I managed to create the perfect proportions, which I'm using from this day, and it makes the details very easy to mold, and figures do not break in the oven.


MY RECIPE FOR SALT DOUGH:
  • 1 cup of flour
  • 1/2 cup of salt (larger amount of salt will make the details crumble in your hand)
  • a flat spoon of wallpaper glue
  • a flat tablespoon of corn flour
  • + / - 1/2 cup of warm water: gradually pour hot water all the time kneading, so that the dough will be perfect for creating products.

NOTE: If you accidentally pour too much water, you have to sprinkle the flour until the mass becomes perfect to make the figures.

To color the dough You can use the food dye, which should be poured before mixing with water.


We can also use natural dyes, which should be poured before mixing with water. They may be available in our kitchen, and besides the color they give dough beautiful scent, for example:
  •  cinnamon (gives slightly brown color and a nice smell) , 
  • coffee, 
  • cocoa 
  • turmeric (which stains the mass of yellow), 
  • pepper (to mass became red), 
and many other spices that may just fall in your hands.


If you want to get a great flavor without color, we add perfume oil while mixing the dough. I love the rosy angels, the scent last for several days.


The finished dough should be baked in the oven preferably on an aluminum foil, at the beginning with the oven door open at most smallest fire (in my oven it is 125 degrees Celsius). After 30 minutes you can close the door and in about few hours the products should be baked enough to go to the next step, which is painting.

A few of my works: